
Pulse® support
Setting up, troubleshooting, and mastering your device.
Pulse® unit setup
Android

Apple iOS

Pulse® website

Pulse® unit setup
- Download the Pulse® app from Google Play.
![]()
- Plug in your Pulse® unit.
- Follow the on-screen instructions to complete the setup process.
|
Screen Image
|
Action Required
|

|
|

|
|

|
|

|
|

|
|

|
|

|
|
|
|

|
|
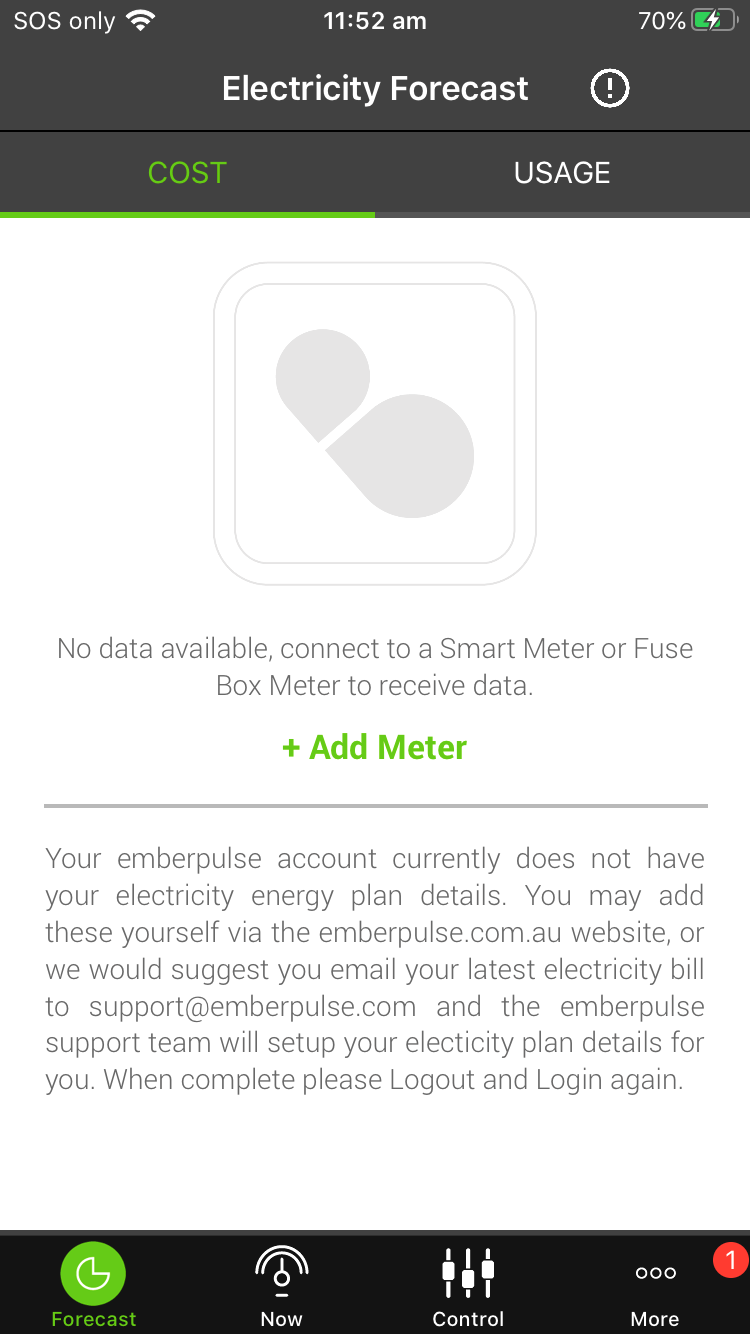
Pulse® Unit Setup
- Download the Pulse® app from the App Store.
![]()
- Plug in your Pulse® unit
- Follow the on-screen instructions to complete the setup process
|
Screen Image
|
Action Required
|

|
|

|
|

|
|

|
|

|
|
|
|
|
|

|
|

|
|
|
|
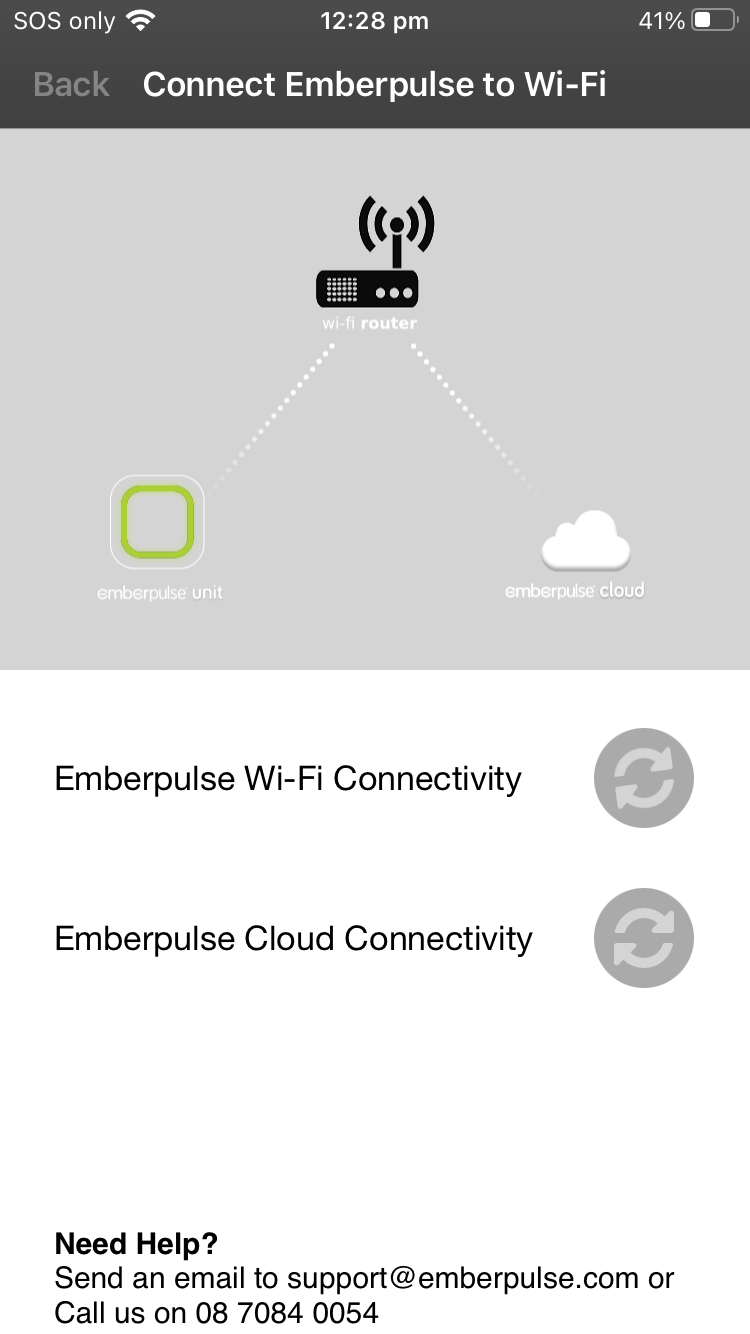
Pulse® Unit Setup
- Plug in your Pulse® unit
- Login to your Pulse® Account using the LOGIN button in the top right hand corner
- Follow the on-screen instructions to complete the setup process
| Screen Image | Action Required |
|---|---|

|
|

|
|

|
|

|
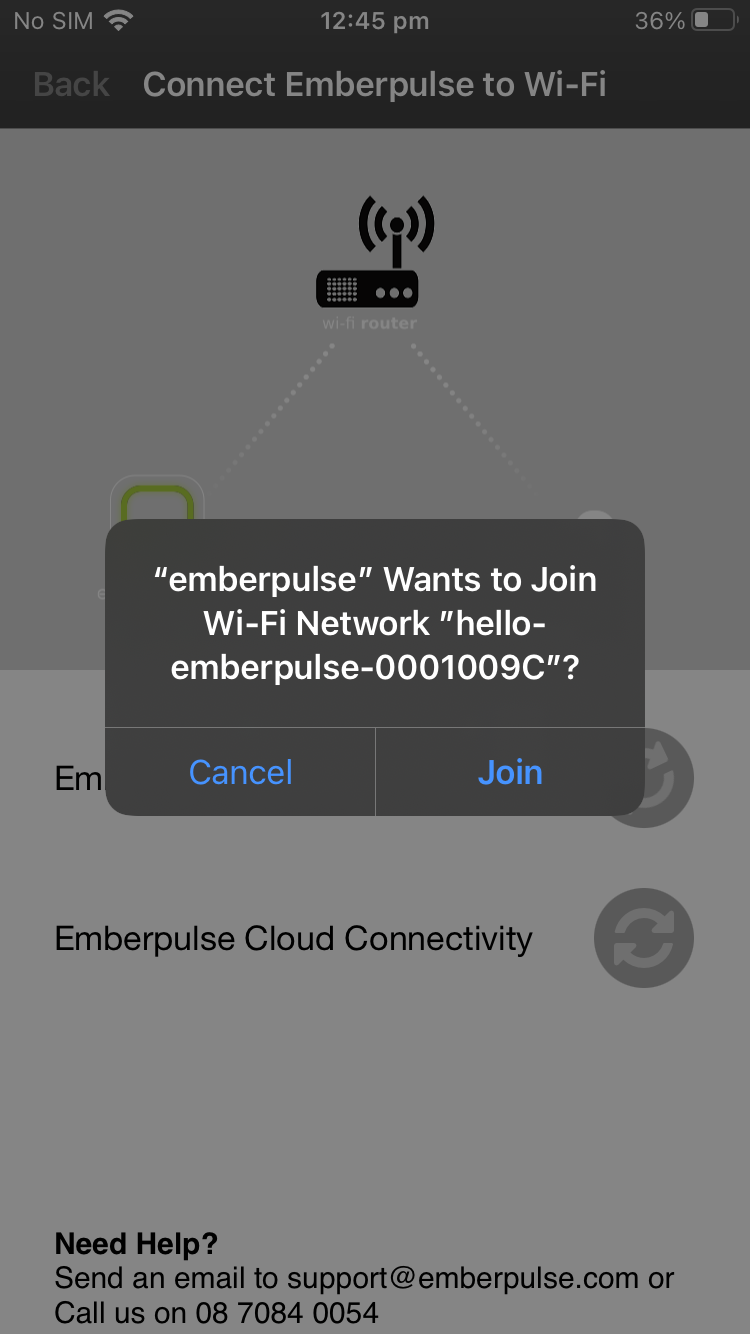
Locate the list of wireless networks on your device by looking for the following symbol:
|

|
|

|
|

|
|
|
|

|
|

Pulse® FAQs
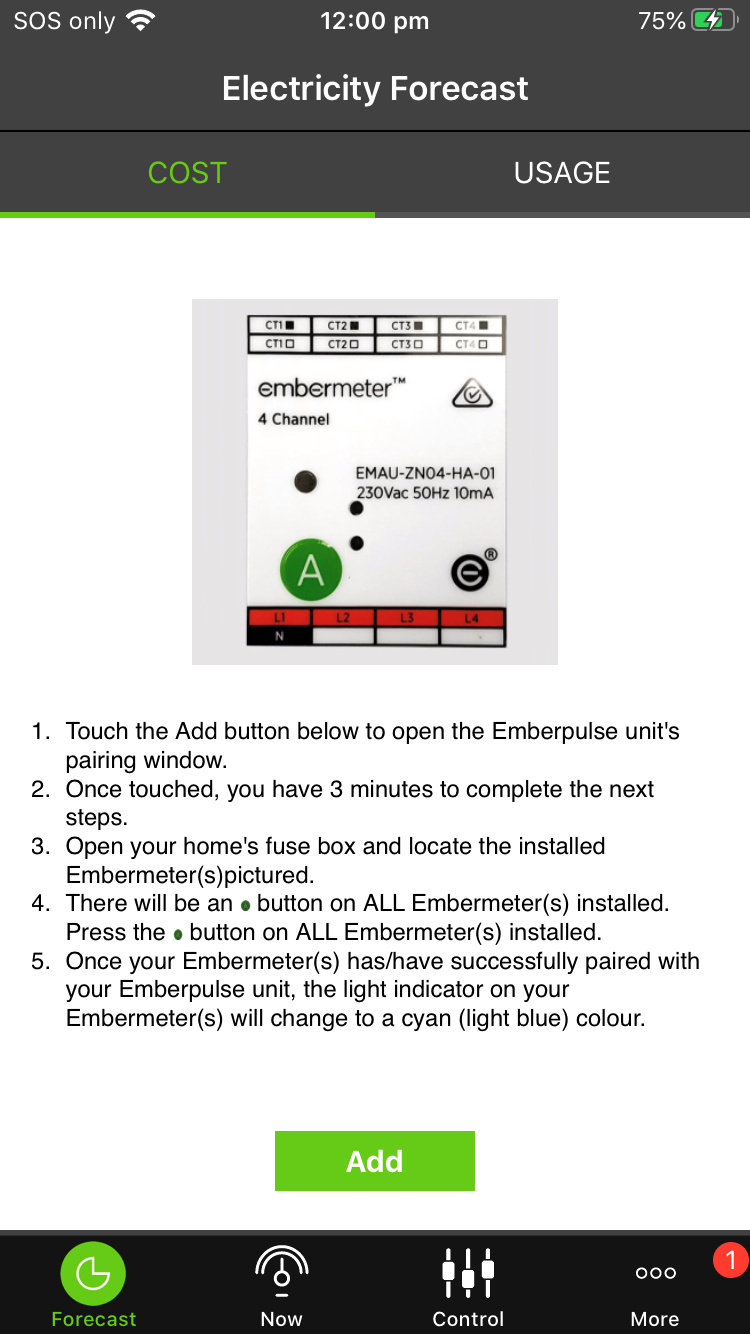
To use Pulse® an approved electrician must install an Embermeter inside your meter box.
You will need to have a constant Wi-Fi connection to have the Pulse®> unit online.
Yes, to monitor individual appliances you can purchase a Emberiq Smart Plug.
Only one Pulse® unit can be installed at your home. There is no benefit in installing additional Pulse® units at the same property.
The Pulse® uses approximately 2.5 watts.
Pulse® support videos
Pulse® setup

Change Wi-Fi network

Reset Embermeter
Pulse® setup video
You should have received your Pulse® account verification email. Please check your inbox (or junk folder) for an email called "Welcome to Pulse®".
If you have not received your account details or a registration code from the installer please contact Pulse® Support to get your account set up.
If your installer has provided you with a registration or company code please select register from the top menu bar and follow the on-screen instructions.
You can also connect your Pulse® through the app, if you have a smart phone download the Pulse® app from your Google Play or the App Store and follow the guides above to get your Pulse® online.
Change Wi-Fi network
Follow the steps in this video to connect your Pulse® back onto your home Wi-Fi. You can use this if you have a new router or changed any of your Wi-Fi details.
Reset Embermeter
Follow the steps in this video to reconnect your Embermeter.
If your Pulse® is currently online but not receiving any readings follow this video to reconnect your Embermeter.
Pulse® user manual
Our user manual is available as a downloadable PDF.